Roll up your sleeves and tackle these beginner-friendly construction projects to sharpen your skills and transform your space: Build a sturdy workbench in a weekend using pre-cut lumber, a drill, and basic hand tools to create a versatile work surface for future projects. Construct custom shelving units to maximize storage and declutter your garage or workshop, utilizing simple measurements, a saw, and energy savings LED shop lights for improved visibility. Elevate your outdoor living with a DIY fire pit, digging a shallow hole, lining it with fire bricks, and finishing with a metal fire ring for a cozy gathering spot. Grow your own produce in raised garden beds, assembling pre-cut wooden boards into rectangular frames, lining with landscape fabric, and filling with nutrient-rich soil for a bountiful harvest.
Project 1: Build a Simple Workbench
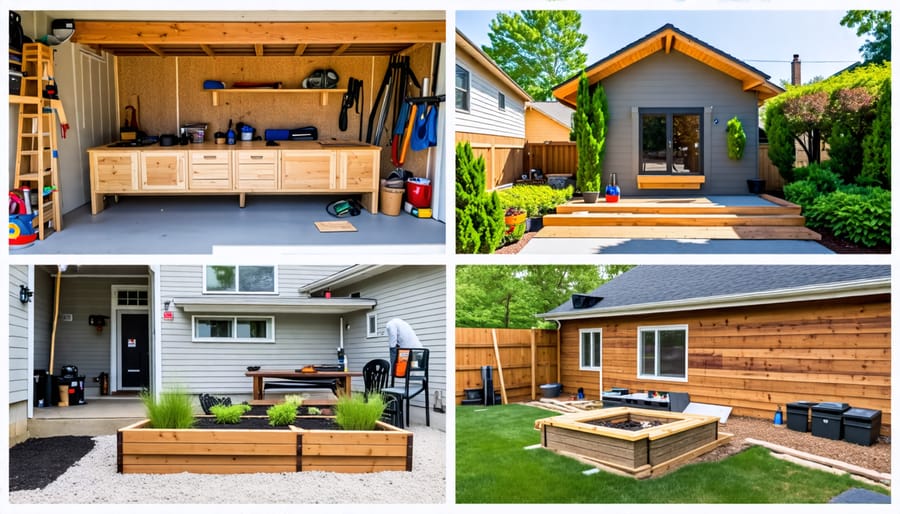
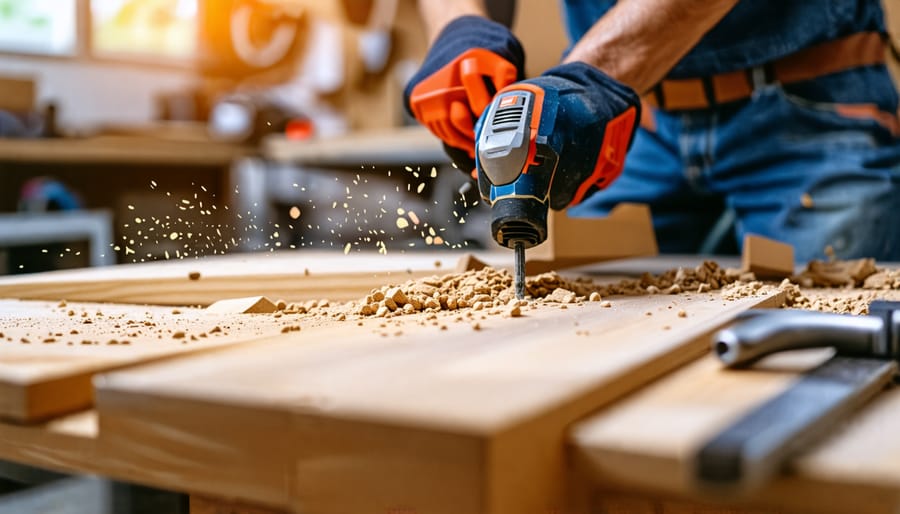
A simple workbench is an essential foundation for any aspiring DIYer or home workshop. To build your own, start by gathering the necessary tools and materials. You’ll need a circular saw, drill, screwdriver, measuring tape, wood glue, clamps, sandpaper, and a framing square. For materials, procure pressure-treated lumber (4x4s for legs, 2x4s for framing, and 4×8 plywood for the top), along with 3″ wood screws and 1-5/8″ screws. Begin by cutting four 4×4 legs to your desired height, typically around 34-38 inches. Next, cut two 2x4s to the length of your bench (commonly 6-8 feet) and two more to the width (minus the 3″ thickness of the legs). Create a box frame by arranging the 2x4s between the legs, ensuring corners are square, then secure with 3″ screws. For added stability, cut 2×4 diagonal braces and attach them between the legs and frame. Sand any rough edges before moving on to the top. Cut your plywood to size, then place it atop the frame, aligning edges. Secure it from underneath with 1-5/8″ screws driven into the frame every 6-8 inches. Sand the plywood for a smooth work surface. If desired, apply a coat of weatherproof sealant to protect the wood. With basic tools and lumber, you can construct a sturdy workbench in a weekend, providing a functional space for all your future DIY endeavors. As your skills grow, consider customizing with drawers, shelves, or pegboard for tool storage.
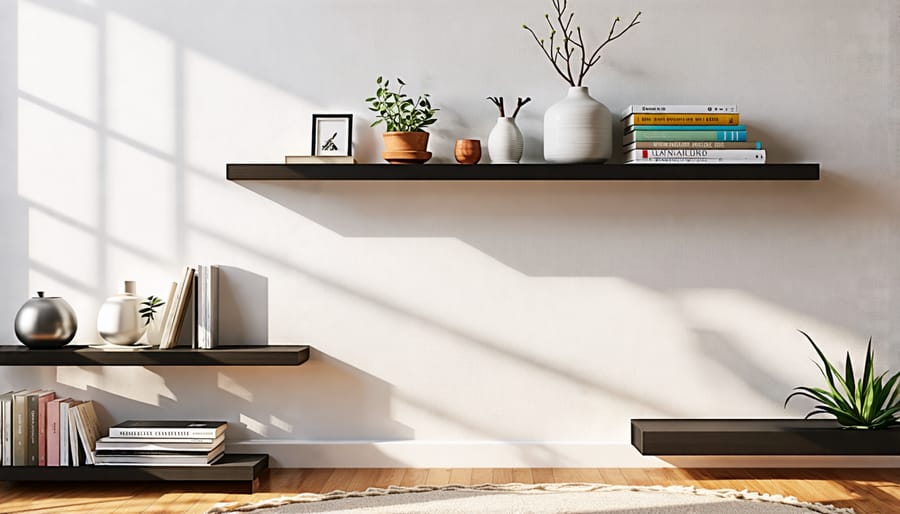
Project 2: Install Floating Shelves
Installing floating shelves is a simple yet impactful way to add stylish storage to any room. To ensure your shelves are level and secure, start by measuring the desired width and marking the wall for bracket placement using a laser level. Most floating shelf kits come with a template to help you align the brackets accurately. Next, use a stud finder to locate the wall studs and mark their positions. If possible, try to anchor the brackets into studs for maximum support. Drill pilot holes at the marked locations, then secure the mounting brackets with the provided screws. With the brackets in place, carefully measure and cut your shelf material to the desired length using a miter saw or circular saw. Sand any rough edges for a clean, professional look. If your floating shelf kit includes a hollow shelf, slide it over the brackets, making sure it fits snugly and is level. For solid shelves, apply construction adhesive to the top of the brackets and place the shelf on top, using a level to ensure it’s straight. Clamp the shelf in place until the adhesive dries completely, following the manufacturer’s instructions. Once the shelves are installed, add a personal touch by styling them with decorative items, books, or plants. Remember to avoid overloading the shelves beyond their weight capacity to maintain their integrity and safety. With these tips in mind, you can confidently install stylish floating shelves that elevate the look and functionality of your space.
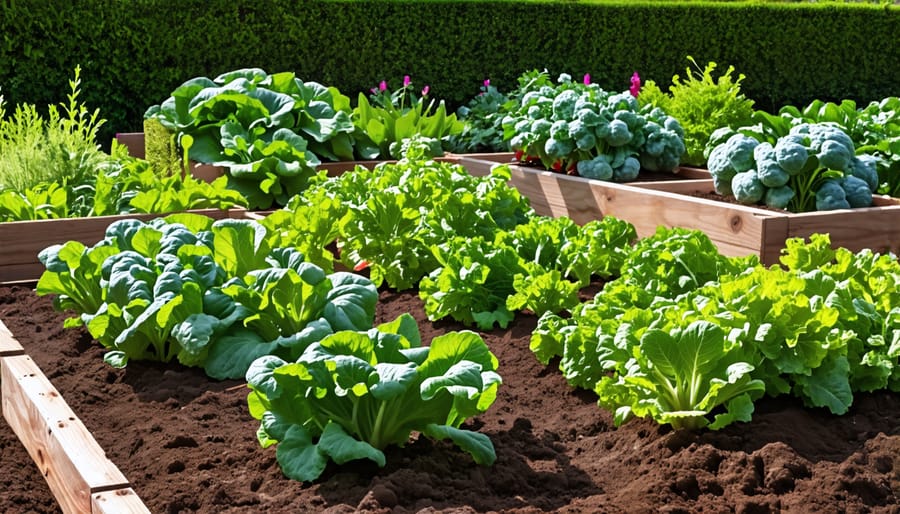
Project 3: Create a Garden Planter Box
Building a wooden planter box is an excellent way to showcase your gardening skills while creating an attractive addition to your outdoor space. To begin, select weather-resistant lumber such as cedar, redwood, or pressure-treated pine. Cut the boards to size according to your desired dimensions, typically around 2 feet wide by 4 feet long and 12 inches deep. Assemble the box using galvanized screws or nails, pre-drilling holes to prevent splitting. For added stability, install corner braces or cross supports. To ensure your planter box withstands the elements, apply a coat of exterior-grade waterproof sealant to all surfaces, paying special attention to the joints and end grains. Allow the sealant to dry completely before filling the box with a high-quality potting mix suitable for the plants you intend to grow. Consider installing a landscaping fabric liner to improve drainage and prevent soil from washing out during watering. When choosing a location for your planter box, opt for a spot that receives the appropriate amount of sunlight for the plants you’ve selected. Raised planter boxes offer the advantage of better drainage and easier access for maintenance, making them an excellent choice for gardeners of all skill levels. With proper care and attention, your custom-built planter box will provide a thriving environment for your plants to flourish, enhancing the beauty of your outdoor living area for years to come.
Project 4: Assemble a Fire Pit
When building a backyard fire pit, consider several factors to ensure a safe and enjoyable experience. First, choose a location at least 10 feet away from structures, overhanging branches, and flammable materials. Check local regulations regarding open flames and any required permits. Prepare a level surface, such as a concrete pad or compacted gravel base, to prevent the pit from tipping. Select fire-resistant materials like stone, brick, or metal for the pit’s construction. Avoid river rocks, which can explode when heated. For a simple design, create a ring using large stones or retaining wall blocks. For a more permanent structure, use fire bricks or poured concrete. Ensure proper ventilation by leaving gaps between stones or installing a metal grate. Include a metal screen to contain sparks and embers. Keep a fire extinguisher, bucket of sand, or garden hose nearby. Only burn dry, seasoned wood to minimize smoke and creosote buildup. Start with kindling and gradually add larger logs. Never leave the fire pit unattended and fully extinguish the flames before leaving the area. With proper planning and precautions, a backyard fire pit can provide warmth and ambiance for countless gatherings.
Project 5: Build a Picnic Table
Building a sturdy outdoor picnic table is a rewarding project that provides a functional gathering spot for meals and entertaining. To construct a basic 6-foot picnic table, you’ll need pressure-treated lumber, exterior-grade screws, and basic tools like a saw, drill, and measuring tape. Start by cutting the lumber to size according to your plan. Assemble the tabletop frame and attach the top boards, ensuring they are evenly spaced. Next, build the benches by constructing the frames and attaching the seat boards. Securely fasten the benches to the tabletop supports. For added stability, install diagonal braces between the bench supports and tabletop frame. Predrill holes to avoid splitting the wood, and use weather-resistant screws suitable for exterior use. Sand any rough edges for a smooth finish. To customize your picnic table, consider applying a stain or paint in a color that complements your outdoor space. For a natural look, use a transparent or semi-transparent wood stain that enhances the wood grain. If you prefer a solid color, choose an exterior-grade paint designed for outdoor furniture. Apply multiple thin coats for even coverage and durability. Properly seal all exposed end grain to prevent moisture damage. Regular maintenance, such as cleaning and reapplying finish as needed, will help your handcrafted picnic table withstand the elements and provide years of outdoor enjoyment. With careful planning and execution, constructing a picnic table is an achievable project for beginner builders looking to enhance their outdoor living area. [298 words]
Project 6: Install a Paver Patio
Installing a paver patio is an excellent beginner-friendly construction project that can transform your outdoor space. To start, measure and mark the desired patio area, accounting for a slight slope for drainage. Excavate the site to a depth of about 7 inches, ensuring a level base. Add a layer of compactible gravel and tamp it down firmly. Next, add a layer of sand and level it with a straight board. Begin laying the pavers from one corner, using a rubber mallet to tap them into place. Use a string line to keep rows straight, and periodically check for level. Cut pavers as needed with a masonry saw for a precise fit. Once all pavers are in place, spread a thin layer of sand over the surface and use a broom to work it into the gaps. Run a plate compactor over the patio to settle the pavers into the sand base. For a professional finish, edge the patio with a concrete border or plastic edging to prevent shifting. Sweep off excess sand, and your new paver patio is ready for use. With proper planning and execution, this project can be completed in a weekend, providing a durable and attractive addition to your yard that will last for years to come.
Project 7: Construct Raised Garden Beds
Constructing raised garden beds is a simple and rewarding project that offers numerous benefits for plants and soil. To begin, gather your materials: untreated lumber (such as cedar or redwood), 3-inch screws, a drill, measuring tape, and a circular saw. A standard size for a raised bed is 4 feet by 8 feet, with a depth of 6 to 12 inches. Cut your lumber to size, creating four sides and any necessary supports. When assembling the bed, pre-drill holes to prevent the wood from splitting. Attach the sides together using 3-inch screws at the corners, ensuring the frame is square. If your bed is longer than 6 feet, add a center support beam for stability. Once the frame is complete, choose a level spot in your yard that receives at least 6 hours of sunlight daily. Place the frame and fill it with a mixture of high-quality topsoil and compost. Raised beds offer several advantages over traditional in-ground gardens. They allow for better drainage and aeration, which is particularly beneficial in areas with heavy clay soils. The elevated design also makes it easier to maintain the beds and harvest your crops without straining your back. Moreover, the contained space helps to reduce weed growth and soil compaction, promoting healthier plant growth. With your raised garden bed complete, you’re ready to plant your favorite vegetables, herbs, or flowers and enjoy the fruits of your labor in the months to come.
Conclusion
Starting small with these easy construction projects is a great way to gain confidence and building skills that will serve you well on more complex jobs. The workbench, shelves, fire pit, picnic table, and raised garden beds covered here provide an approachable entry point into woodworking and masonry. Each can be tackled in a weekend with basic tools and materials. The end products are not only satisfying to complete, but highly practical and attractive additions to your home and yard. So choose a project that inspires you, gather your supplies, and dive in this weekend – you’ll be amazed at what you can accomplish. With every project, your abilities and ambition will grow.